

Juicy & Flavorful: Best Steak Cooking Methods
Craving the perfect steak? Throw away your idea of visiting a steakhouse because this guide will teach you exactly how to prepare restaurant-grade steaks in your kitchen. Novice cooks, along with experienced home chefs, can use the best steak cooking techniques to achieve superior culinary skills.
Students will find the ultimate information about steak preparation inside this tutorial, which details selection matters alongside doneness achievement methods. Home chefs frequently face three significant cooking problems while preparing their steaks: meat becomes dry and tough because of overcooking, and it develops a smoky black exterior while maintaining raw interior territories, or the surface remains pale without enough crust formation. Steak cooking has no more mysteries because you are about to become a complete expert at this.
Table of Contents
Choosing the Right Steak Cut
Selecting the perfect cut of steak marks the initial stage of achieving a perfect steak. Each different steak type brings specific flavor characteristics together with different tenderness qualities and fat quantities, affecting preferred cooking methods.
Ribeye
- Flavor Profile: The steaks showcase a rich beef flavor with buttery intensities and intense beef taste
- Tenderness: Very tender due to abundant marbling
- Fat Content: High marbling throughout
- Best Cooking Methods: You should use pan-seared or grilled, or reverse-seared techniques for preparing steaks
- Why We Love It: The ribeye stands out to us because its abundant marbling allows it to baste itself during cooking, thus producing succulent steaks each time.
Filet Mignon
- Flavor Profile: The meat has a buttery beef taste followed by dainty notes during consumption
- Tenderness: This beef cut has such high tenderness that it can be cut using only a makeshift butter knife.
- Fat Content: Very lean with minimal marbling
- Best Cooking Methods: People opt for butter-based basting during pan-searing when using sous vide preparation techniques
- Why We Love It: Special celebrations benefit from the filet because its superior tenderness easily surpasses its less pronounced flavor
New York Strip
- Flavor Profile: Bold, beefy flavor
- Tenderness: Consumers can expect a moderate tenderness in their portion, along with light chewiness
- Fat Content: The steak contains moderate marbling, together with a fat cap situated on its surface
- Best Cooking Methods: You should grill or pan-sear, or broil this particular meat cut
- Why We Love It: The strip stands out as a fantastic dining option because it delivers delicious taste with melt-in-your-mouth tenderness
Sirloin
- Flavor Profile: Robust beef flavor
- The meat maintains its eating quality during proper cooking procedures, even though it falls short of premium cuts in tenderness
- As a lean cut, it offers low fat content together with modest marbling features
- Best Cooking Methods: Grilling, broiling
- The luxurious taste of Sirlon exists at pricing levels that most customers can afford
Flank & Skirt Steak
- This cut delivers beefy taste notes, which are distinctive and powerful
- The steak maintains its enviable hardness even though appropriate cooking techniques will transform it into lip-smacking perfection
- Fat Content: Lean with visible grain
- Marinated cuts need to be subjected to hot/fast grilling, as among the two approved cooking methods
- The combination of these cuts delivers impressive taste as well as excellent marinade results. Shepherd AZ obtains well-pleasing Steak pieces by slicing the beef in alignment with its grain structure
Essential Equipment
Home cooking of steakhouse-quality meals becomes streamlined through the use of proper kitchen equipment:
Must-Have Equipment:
- A cast iron skillet serves this purpose very well because it keeps a steady temperature while it delivers equal heat distribution to create a perfect seared steak
- Superior quality tongs serve as a necessary tool to flip a steak without damaging its structure
- An independent instant-read meat thermometer provides the best way to check food doneness
- The most effective tool for cutting steak is a board that contains a channel to capture dripping juices
- A very sharp knife cuts the steak perfectly, which saves valuable juices
Optional but Beneficial:
- Sous Vide Machine: For precise temperature control
- This device runs on natural gas for conventional barbecue flavor and also functions with charcoal
- A smoker works as an additional method to improve the flavor of food
- Using a cooking timer represents an important equipment for accurately following cooking timelines
- Meat weights serve as fundamental tools by spreading heat evenly to cook food surfaces uniformly
Steak Preparation (The Pre-Cook Checklist)
Thawing
Proper thawing techniques produce uniform cooking because they eliminate unevenness in steak cooking. The presence of ice within a steak results in uneven cooking since freezing damages the cooking process.
Recommended Methods:
- A steak requiring thawing must sit in the refrigerator for 24 to 48 hours, yet the duration depends on its thickness. This slow thaw preserves quality.
- Users must change the cold water periodically when thawing vacuum-sealed steaks by submersion. Steaks that measure one inch need one hour to completely thaw.
Patting Dry
All steaks require complete paper towel pat drying before entering the cooking process. The application of paper towels for drying the steak creates the foundation for ideal sealing. A steaming surface containing moisture leads to steam formation, which halts the development of brown crust through the Maillard reaction.
Salting (Dry Brining)
Dry brining allows steak to soak in salt for 40 minutes to 24 hours, which creates better flavor as well as texture.
“Besides adding taste to your meat you should apply salt because this ingredient reconstructs muscle fibers to fight moisture loss during cooking.”
The process begins when salt actively pulls water out from the beef before dissolving completely inside the steel water solution to form a salty liquid solution. During this process, the meat absorbs the brine substance,e which provides flavor as well as moisture retention during cooking.
Timing Options:
- Right Before Cooking: Good
- A prolonged brine absorption can be achieved through salting the steak 40 minutes to 2 hours before cooking
- 24 Hours in Advance (Refrigerated): Best (deepest flavor penetration)
Seasoning
Excellent steak demands only salt and pepper, but various seasonings enhance different cuts of meat effectively.
Classic Approach:
- Coarse kosher salt
- Freshly ground black pepper
- Applied after patting dry
Enhanced Options:
- Garlic powder, onion powder, or crushed dried herbs
- Steak rubs available at retail stores that do not contain high amounts of sugar should be considered
- The finishing of steaks can be done with compound butter that includes herb butter and blue cheese butter
Bringing to Room Temperature
A 30-60 minute period of letting your steak sit at room temperature will result in consistent cooking throughout its entire surface from the outside to the inside.
Benefits:
- Reduced cooking time
- More even doneness
- Better sear (dry surface)
Note: Sources that specialize in food safety recommend keeping exposed food items at room temperature for only two hours or less.
The Core: Detailed Cooking Methods
Pan Searing
Among home cooking methods, pan searing provides the most adaptable way to create ideal steaks because it achieves crust formation while keeping steaks moist. The Maillard reaction occurring on the steak produces flavorful crust with its juice staying tender within.
Step-by-Step Instructions:
- Prepare your skillet by applying heat to a cast-iron pan until it reaches extremely hot surface temperatures for a duration of 5-10 minutes of heating.
- Before adding the steak, put a thin layer of cooking oil like avocado or grapeseed, or canola.
- Position the steak in the heated pan by guiding it from your direction to stop oil from spattering.
- Steak should remain undisturbed in the pan for 3-4 minutes to form a crust when measuring at 1-inch thickness.
- Turn the steak just once after it naturally comes loose from the pan surface.
- During the last cooking minutes, add butter with garlic and fresh herbs to increase flavor.
- Baste: Tilt the pan and spoon the melted butter over the steak repeatedly.
- The correct doneness can be verified by using a meat thermometer.
- Keeping the steak on a cutting board for a period of rest is crucial.
Troubleshooting:
- Sticking to the plan? You applied heat to your pan at an insufficient temperature before putting the steak inside.
- Too much smoke? High pan heat or the use of oil with a low smoke point characterizes your situation.
- Burning exterior before interior cooks? Using this approach independently will not properly cook either a cold steak or a thick piece of meat.
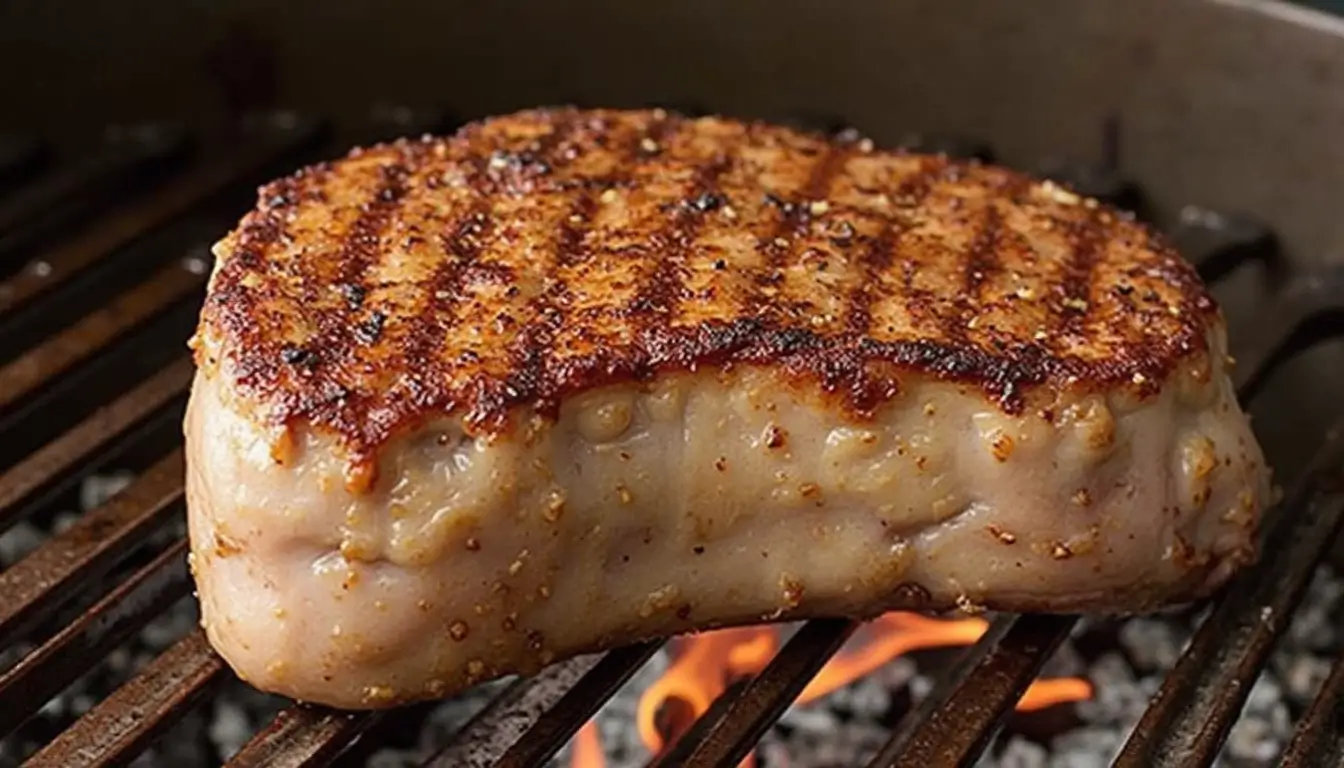
Grilling
The smoky flavor, which comes from grilling, becomes essential to steak aficionados.
Grilling Methods:
Direct Heat Grilling:
- Preheat grill: Heat to high (450-500°F).
- Temperature zones need separate areas with high direct heat and medium heat temperatures.
- Pacing the steak on the most intensely hot part of the grill will begin the searing process.
- Move the steak to medium heat after achieving two or three minutes of grill marks for completion.
- Steak should be taken off the heat when its internal temperature reaches a 5°F colder target point.
Two-Zone Grilling (for thicker steaks):
- Establish a temperature gradient between direct heat on one side and heatless on the other side of the cooking surface.
- Start with cooking the steak while covered until the temperature reaches 15-20°F less than your target range.
- The final step includes heating the steak directly to achieve a crust.
Charcoal vs. Gas:
- Customers who use charcoal achieve superior steak taste, yet need advanced skills to prevent temperature variations.
- Using gas allows users to have easy operation and temperature adjustments at the cost of reduced charcoal flavor intensity.
Reverse Sear
Home steak cooking transformed thanks to the reverse sear method that provides excellent restaurant standards alongside dependable precision.
The Science: The reverse sear technique permits accurate doneness delivery through its combination of low-then-high heat application to achieve the perfect crust.
Step-by-Step Instructions:
- Preheat oven: Set to 275°F.
- Put the steak on a wire rack placed over a baking sheet after applying the seasonings.
- Place the steak on a rack, then bake it until it hits 15 degrees Fahrenheit short of your desired level of doneness (a steak of 1½ inches should cook between 30 to 45 minutes).
- Set the steak aside briefly by taking it out of the oven and allowing it to rest for 5-10 minutes.
- Fry steaks at high temperature in a cast-iron skillet until they develop a smoking point and cook for 45-60 seconds on each side.
- Bringing the steak to rest for 5-10 minutes follows after completion of baking.
Advantages:
- Exceptional edge-to-edge consistency
- Better moisture retention
- More precise temperature control
- Reduced stress about timing
Sous Vide
Sous vide achieves unparalleled perfection when it comes to controlling the cooking temperature of food.
Process:
- Determining the water temperature requires referring to the doneness temperature chart.
- After applying seasonings, the steak should receive vacuum sealing treatment.
- Cook: Submerge in water bath for 1-4 hours (1-inch steak: 1 hour; 2-inch steak: 3 hours).
- Individuals should remove the bagged steak, then dry it completely before searing each side for 30-60 seconds on a super-hot griddle.
Recommended Temperatures:
- Rare: 120°F (49°C)
- Medium-Rare: 129°F (54°C)
- Medium: 135°F (57°C)
- Medium-Well: 145°F (63°C)
- Well-Done: 156°F (69°C)

Broiling
Broiling is an excellent indoor option when you want results similar to grilling.
Process:
- Position rack: Place oven rack 3-4 inches from broiler.
- Preheat broiler: Allow to heat fully (5-10 minutes).
- Prepare pan: Use a broiler-safe pan or cast-iron skillet.
- Cook: Broil 3-4 minutes per side for 1-inch steaks.
- Monitor closely: Broilers vary greatly in temperature; watch carefully to prevent burning.
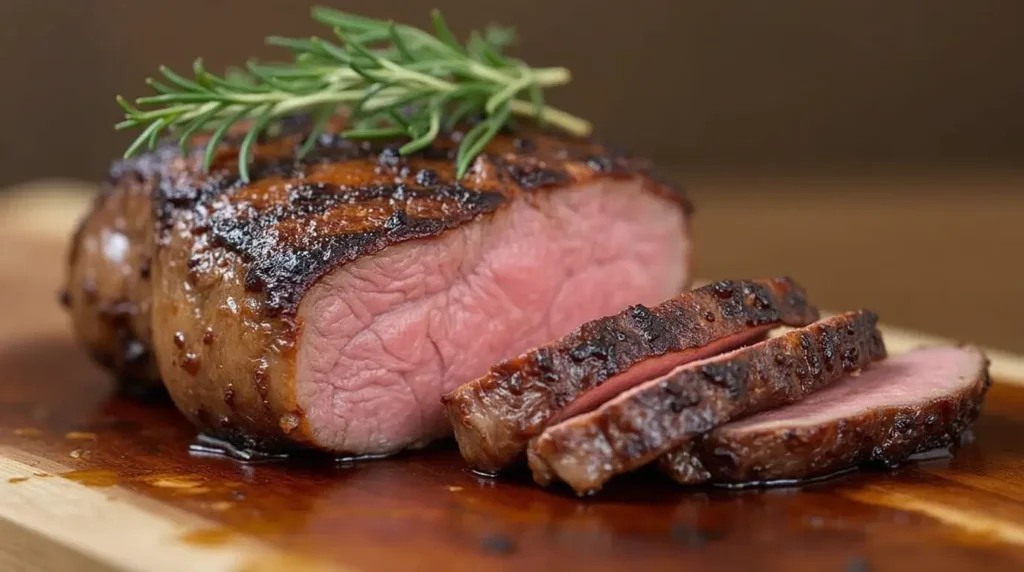
Steak Doneness
Achieving your preferred doneness consistently is the mark of a true steak master.
Internal Temperature Guide:
| Doneness | Remove at | Final Temp | Appearance | Texture |
|---|---|---|---|---|
| Rare | 120°F | 125°F | Red center, cool | Soft, tender |
| Medium-Rare | 130°F | 135°F | Red center, warm | Tender, juicy |
| Medium | 140°F | 145°F | Pink center, hot | Slightly firm |
| Medium-Well | 150°F | 155°F | Slight pink | Firm |
| Well-Done | 160°F | 165°F | Brown throughout | Firm, less juicy |
Carryover Cooking
Chemical heat transfer following cooking will naturally raise steak temperature by 5-10 degrees Fahrenheit during the rest period. The outer heat continues to move towards the inner portion of the meat throughout this process.
Factors affecting carryover:
- The extent of carryover cooking depends on steak thickness, whereby thicker pieces will experience greater carryover than thinner ones.
- A steaming temperature will generate higher levels of carryover because of its elevated heat output.
- The temperature of the resting area determines the extent of carryover effects on the steak.
Resting the Steak
The mandatory process of resting is crucial because it optimizes both taste and moisture retention.
Why Rest? When cooked, the muscle fibers constrict to move liquid to the center of the steak. Resting time gives muscle fibers an opportunity to recover their natural state, which results in the absorption of juices rather than producing leaks at the cutting time.
Recommended Resting Times:
- Thin steaks (½-¾ inch): 5 minutes
- Medium steaks (1-1½ inch): 7-10 minutes
- Thick steaks (1½-2 inch): 10-15 minutes
Pro Tip: To retain heat but prevent steam build-up, which damages your crust, you should loosely cover your tent with foil.
Slicing and Serving
When you cut your steak, its texture and eating experience will change.
Slicing Guidelines:
- Examine the meat grain to locate the natural direction of its muscle fibers.
- Normal cut produces thinner slices by positioning the knife from one side of the steak to the other against the muscle direction.
- Thin, clean slices made possible by using a highly sharp knife help maintain steak juice content.
- Better and wider slices of meat result from a cutting angle.
Serving Suggestions:
- Classical Accompaniments: Compound butter, bearnaise sauce, chimichurri
- Side dishes: should include roast potatoes with grilled asparagus served with creamed spinach
- Wine Pairings: Bold reds like Cabernet Sauvignon or Malbec
Troubleshooting
Even experienced cooks encounter challenges. Multiple approaches exist to resolve stakeholder-related issues according to the following sequence:
Overcooked Steak
- The combination of faulty temperature readings and too long cooking time causes the problem.
- The right approach involves testing steak using an exact meat thermometer before conducting the necessary carryover cooking calculations.
- Before the actual temperature target steak needs to be removed 5-10 degrees Fahrenheit below the mark
Undercooked Steak
- The main causes stem from cooking without prior temperature adjustments and using inconsistent heating, along with an unreliable thermometer.
- Slightly heat the steak by applying lower heat to prevent damage to the external steak surfaces.
- Bring the steak to the same temperature as the room before heating it for cooking.
Tough Steak
- A tough steak, along with an overcooked texture, occurs because of bad cuts and excessive cooking time combined with improper slicing methods.
- To reduce toughness, you should cut through the grain in thin pieces
- The prevention of steak issues depends on selecting well-marbled meat that should not be cooked past medium doneness.
Lack of Sear
- The combination of a wet surface, along with a cool pan heating system and crowded frying conditions, causes this issue.
- A proper solution includes complete pan preheating combined with steak dehydration and single steak cooking.
- The prevention includes the following standard preparation methods, which must include drying.
FAQ Section
Q: When purchasing steak, should I visit the butcher shop instead of the retail market? A: Specialty butchers deliver superior cuts of higher quality and professional expertise about specific steak needs, although supermarkets provide suitable steak selections.
Q: What is the optimal tolerance thickness for my steak? A: The preferred thickness for most steak cooking methods should measure at 1½ inches. Steak thickness affects the required cooking method because thin pieces get done fast, while thick steak demands reverse searing techniques.
Q: Do I require a thermometer to check my meat temperature? A: Yes! Even professional chefs use thermometers. Professional instant-read thermometers deliver more accurate readings compared to the unreliable finger test or manual estimates.
Q: What approach should novices follow for preparing their dishes? A: Before all else, pan sautéing provides the easiest approach, yet reverse searing delivers both excellent consistency and tolerance to errors during food preparation.
When it comes to preparing steak, how do you prefer to do it? Leave your perspectives and inquiries regarding steak cooking in the comment section.
Have you given our recipe a try?
There are no reviews yet. Be the first one to write one.
